LaTeX-ing your thesis
Work set-up
To begin with my working space is based on compartments. Initially this was not the case, however, as I gradually worked on the thesis, the number of files grew and scrolling through the document became a headache if I didn't put my files into their own compartments. Reading this tutorial on how to go about large documents withLaTeX helped me a lot.
Main folder
The main folder contains 9 sub-folders, and 9 files includring the root file,THESIS.tex.
The 9 sub-folders
BackFrontMat/– This folder contains the files for the back and front matter—one.texfor each special chapter. For my case, the ones I have for the front matter are: Front/Title page (a customised page), Abstract, Acknowledgements, Abbreviations, and the Tables pages—Table of Contents (ToC), List of Figures (LoF), and List of Tables (LoT). For the back matter the files are: Appendices and References. I separated them from the other chapters since they special chapters and the way they were set were different from the rest of the regular chapters.Chapters/– This folder contains 6.texfiles:ch01.textoch06.texSections/– This folder contains several.texfiles, whose naming convention starts with the chapter the section is associated with e.g.ch01_intro.texrefers to Chapter 1 Introductionfiguras/– Contains.texfiles for the figures in the thesis. Each file is created for each figure and called when writing using\input{figuras/*figurefilename}. These figures are the ones that use external images (i.e., images not generated throughLaTeX)filesdat/– Where all.datdata files are stored (for graphs, illustrations, etc.)fonts/– Where I store all the fonts that I need in the thesis. Although they are my system fonts, I decided to store them here especially so that I need not use some hefty directory changes when calling the fonts I needimagen/– Where the external images are stored (i.e.,.png,.jpg, etc. images); this folder is specified in the preamble as the path where all image files are storedmesas/– Contains all the codes for the tables. Individual tables are individual.texfiles so that in the section where I need the table I just use\input{mesas/*tablefilename}tikzfiguras/– This is where I store the files for figures generated usingTikZ/PGF. Each file is then called within the thesis using\input{tikzfiguras/*tikzfigurefilename}
Main TeX file
This is how THESIS.tex looks like:
Top of preamble
   \documentclass[a4paper,11pt]{report}
   \renewcommand*{\familydefault}{\sfdefault}
   \usepackage[hoffset=0.5truein,vscale=0.8,footskip=1.8truecm]{geometry}
   \usepackage[english]{babel}
Glossary
   \usepackage[nonumberlist,nopostdot,style=super]{glossaries}
   \usepackage{acronym}
   \usepackage{glossary-mcols}
   %firstchar uppercase, text lowercase
   \let\firstchar\lowercase
   \let\oldprintglossary\printglossary
   \def\printglossary{\let\firstchar\uppercase\oldprintglossary}

   \makeglossaries

   \renewcommand{\glsnamefont}[1]{\textbf{#1}}
   \setlength{\glsdescwidth}{0.8\textwidth}
The firstchar code is from this tutorial on TeX.SE. What this code does is that it renders the first letter of the definition uppercase on the Abbreviations page, and when used in the main text, the first letter is rendered in lowercase. Without this code, the whole thing becomes a wee bit awkward, with random words which are not meant to be in uppercase rendered as such.
At the glossary page:
This piece of code is inserted in the file agloss.tex. Since the chapter is not part of the usual numbered chapters, it is necessary to add the second line of the code so that the chapter is added to the ToC page. On line 10, \glossyname is a macro created so that the chapter is named as Abbreviations instead of Glossary. The \textbf{Abbreviations} part is a sort of hacky way of adding the title of the chapter in the ToC. Without it, the chapter title is added in the ToC, but not in boldface.
   \newpage
   \cleardoublepage\phantomsection\addcontentsline{toc}{chapter}{\textbf{Abbreviations}}
   \Charter
   %example glossary entries
     \newacronym{CFCs}{CFCs}{\firstchar{C}hlorofluorocarbons}
     \newacronym{GHGs}{GHGs}{\firstchar{G}reenhouse gases}
     \newacronym{IPCC}{IPCC}{Intergovernmental Panel on Climate Change}
   \begin{spacing}{1}
   \glsaddall
   \printglossary[title={\glossyname}]
   \end{spacing}
   \newpage
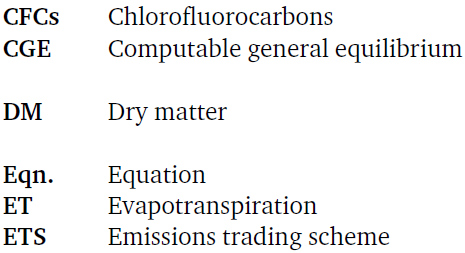
As an example, here is what the entries in the Abbreviations page looks like:
Within the text, this is what the firstchar does:


Without firstchar since it is an organisation name:

Some notes:
- The macro
\glossynamewas created since what I have in my thesis were abbreviations and not definitions—which if it were the latter, then Glossary would have been more appropriate, and\printglossarywould have sufficed. - The macro
\Charteron line 3 of the code is a font macro, which is another hacky way of mine to render the body text as serif (Charter) while leaving the rest in sans-serif (Fira Sans).